Using Adobe InDesign Templates
This is a quick guide to using the Industry Specific Adobe InDesign templates. The templates come with placeholder text and images, therefore all that needs to be done is to replace the placeholders with your own text and images.
Opening the Template and View Settings
Once the InDesign templates are downloaded you can open your template file by double-clicking the .indd file.
NOTE: Once the template is open, you may notice that some of the help text is hard to read or blurry. This is because InDesign generally will open a document in the Typical Display view. To correct this open the template, select View from the menu bar. Go to the Display Performance and select High Quality Display. We also recommend that you view your templates at at least 100%.

Replacing the Text
This is a very simple task. View your template in normal mode (press ""W"" if you can't see any guides or boxes). Now, you can just double click on the text boxes and change the text accordingly. The character and styles should stay the same, but if you would like to change them you can either:
1) Change each individual area as you see fit by using the text toolbar or,
2) Change the character styles in the document, which will change all of the text with these styles applied to them.
Replacing the Images
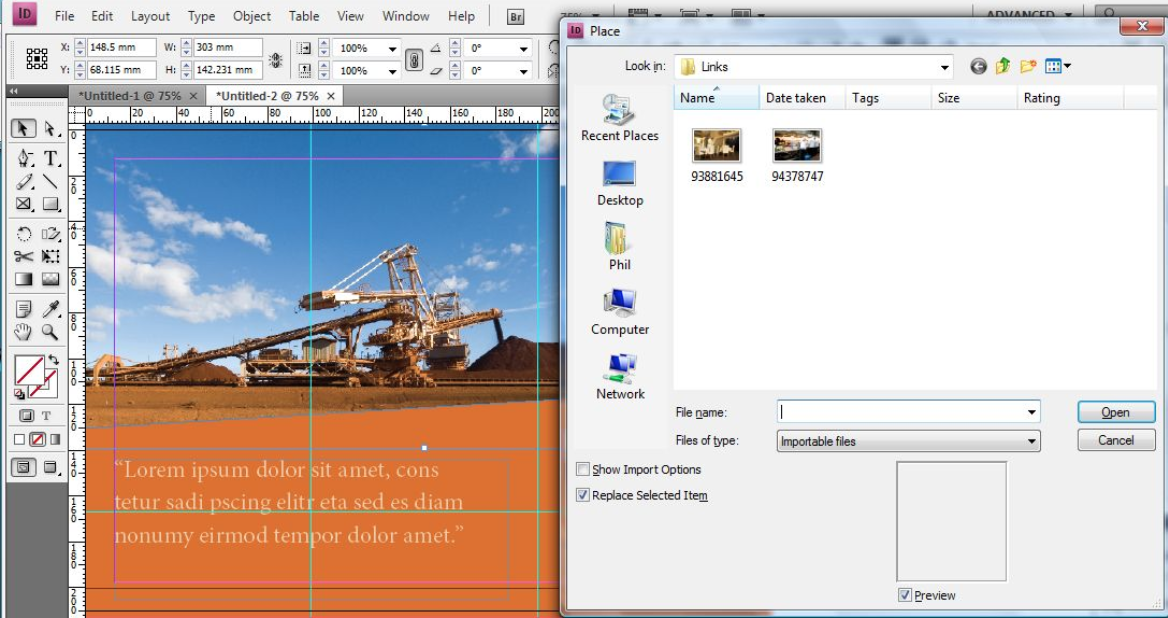
You can simply click once on the placeholder image, and hit Ctrl+D (Command+D on a Mac) to place a new image in the frame.

The image probably will not fit into the frame properly - you can adjust this by right clicking, going to ""Fitting"", and selecting the option which best suites your image.
If you would only like to use a portion on the image, you can adjust the size by going to your Direct Selection tool (white cursor) and clicking on the frame. Now you will be able to adjust the image size while keeping the image frame the same size. The document will only display the portions of the image which are inside the frame.
Carly Brown
Comments